

How to Paint Neon Lights: A Simple DIY Guide for Creating a Faux Neon Glow
This post contains affiliate links. I may earn a small commission from purchases made through them, at no extra cost to you. As an Amazon Associate, I earn from qualifying purchases.
Creating a neon light effect with paint is a fun way to make decorative artwork without using real neon tubes. A dark background, bright colors, and carefully applied layers can create the illusion of glowing neon lines.
This DIY method is suitable for beginners who want to create wall decorations, custom signs, gift artwork, or creative room designs. The main focus is not only choosing bright colors but also building depth through multiple paint layers and highlights.
The faux neon style works because strong contrast between a dark surface and bright paint makes the colors appear more luminous.
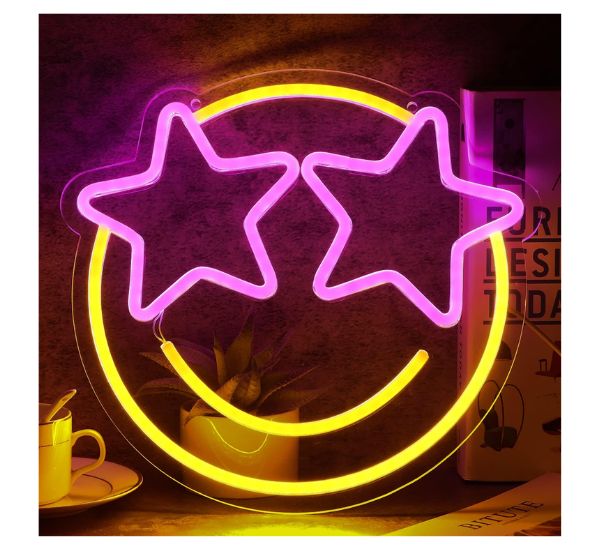
Materials Needed for Painting Neon Lights
Before starting your project, prepare all required materials. Having everything ready helps create cleaner lines and a smoother painting experience.
| Material | Purpose |
|---|---|
| Black canvas or dark surface | Creates contrast for the glow effect |
| Acrylic paint | Provides bright neon-style colors |
| POSCA paint markers | Helps create smooth and clean lines |
| Paint brushes | Used for filling and detailing |
| Pencil | Helps sketch the design first |
| Eraser | Removes unwanted guide marks |
| Colored pencil | Adds soft outer glow |
| White paint marker | Creates the bright neon center |
Commonly used colors include:
- Pink
- Blue
- Green
- Orange
- Yellow
- White highlights
Step 1: Choose and Sketch Your Neon Design
Start by selecting a simple design. Beginners should avoid complicated artwork because neon signs usually look better with clean and flowing shapes.
Popular design ideas include:
- Short words
- Symbols
- Hearts
- Stars
- Simple icons
- Decorative lines
Use a pencil to lightly draw the design before applying paint. Keeping the outline simple makes the final glow effect more realistic.
Step 2: Prepare the Dark Background
A dark surface is important because neon colors become more visible against black or deep colors.
You can use:
- Black canvas
- Black cardstock
- Dark painting board
The background works like the night sky, allowing the bright colors to stand out.
Step 3: Apply the First Neon Paint Layer
Begin painting your main neon color over the sketch.
Important points:
- Apply an even coat.
- Keep the lines consistent.
- Allow the paint to dry before adding another layer.
- Avoid rushing because wet layers can mix and reduce brightness.
The first layer creates the foundation of your neon tube effect.
Step 4: Build the Glow With Multiple Layers
The glow effect comes from layering, not from using only one thick coat.
A common layering method:
| Layer | Purpose |
|---|---|
| First layer | Creates the main neon color |
| Second layer | Makes the color stronger |
| Third layer | Improves brightness and depth |
| White center line | Creates realistic light intensity |
According to the painting tutorials, different colors may need different numbers of coats:
| Color | Layers Used |
|---|---|
| Pink marker | 4 layers |
| Blue marker | 3 layers |
| White highlight | 2–3 layers |
Allow each layer to dry before applying the next one.
Step 5: Add the White Neon Highlight
The white center line is one of the most important parts of creating a realistic neon appearance.
The technique:
- Add a thin white line in the middle of the colored stroke.
- Let it dry.
- Repeat if more brightness is needed.
The white highlight creates the appearance of light coming from the center of a neon tube.
Step 6: Create the Soft Outer Glow
For an extra realistic appearance, add a gentle glow around the painted line.
You can use:
- Matching colored pencil
- Light paint shading
- Soft blending around edges
This makes the artwork appear less flat and gives it more depth.
Step 7: Protect Your Finished Artwork
After the painting is completely dry, protect the surface.
A finishing layer can help:
- Keep colors brighter
- Reduce damage
- Improve durability
- Maintain the artwork quality
Neon Painting Process Overview
| Step | Action | Main Goal |
|---|---|---|
| 1 | Select design | Create a clear idea |
| 2 | Prepare dark surface | Improve contrast |
| 3 | Sketch outline | Guide painting |
| 4 | Apply neon color | Build base effect |
| 5 | Add extra layers | Increase brightness |
| 6 | Add white highlight | Create glowing center |
| 7 | Add outer glow | Improve realism |
| 8 | Seal artwork | Protect final result |
Common Mistakes to Avoid
Avoid these problems when creating your faux neon artwork:
- Applying too much paint in one coat
- Adding new layers before previous paint dries
- Using a complicated design
- Skipping the dark background
- Forgetting the white highlight
- Creating uneven lines
Small details make a big difference in the final appearance.
Tips for a Better Neon Light Painting Result
- Use bright colors with strong contrast.
- Practice marker lines before painting the final design.
- Keep neon lines smooth and consistent.
- Leave enough space between different shapes.
- Test colors before applying them to your main artwork.
- Let every layer dry properly.
(FAQ) for Lights Neon
Can I paint real neon tubes?
No. This technique is designed for creating a faux neon effect on surfaces like canvas or cardstock. It creates the appearance of neon through paint techniques.
What surface works best for neon painting?
A black canvas or dark surface works well because bright colors become more visible and create stronger contrast.
How many paint layers are needed for neon effects?
The number depends on the color. Some designs may need multiple coats. In one tutorial, pink required 4 layers, blue required 3 layers, and white highlights were applied 2–3 times.
Do I need professional art skills?
No. Beginners can create neon-style artwork by starting with simple shapes and practicing clean lines.
Why is white paint used in neon artwork?
The white center line creates the brightest part of the design and helps imitate the appearance of glowing neon tubing.
Final Thoughts for Neon Light
Painting neon lights is a creative DIY project that combines simple materials with smart painting techniques. The secret is using a dark background, applying bright colors in layers, and adding white highlights to create the illusion of real light.
With patience and careful layering, beginners can create attractive faux neon signs for home decoration, gifts, and personal artwork.

Dylan
Dylan is a lighting enthusiast and experienced content creator with 7 years of expertise in blogging about home improvement, lighting solutions, and modern illumination trends. As the lead writer for BrightLightZone, Dylan focuses on simplifying complex lighting topics and helping readers discover practical, energy-efficient, and innovative lighting ideas for their homes and spaces.
With a passion for exploring the latest advancements in LED technology, smart lighting, and DIY lighting solutions, Dylan combines research, creativity, and real-world insights to create helpful guides for homeowners, DIY enthusiasts, and lighting lovers. Through BrightLightZone, Dylan aims to inspire people to transform their environments with smarter, brighter, and more sustainable lighting choices.


